Getting Started with Bootstrap 5 Admin Dashboard: Complete Tutorial 2026
 Łukasz Holeczek
Follow Łukasz Holeczek on GitHub
Connect with Łukasz Holeczek on LinkedIn
Follow Łukasz Holeczek on X (Twitter)
Łukasz Holeczek
Follow Łukasz Holeczek on GitHub
Connect with Łukasz Holeczek on LinkedIn
Follow Łukasz Holeczek on X (Twitter)
Ready to build your first Bootstrap 5 admin dashboard? This step-by-step tutorial walks you through everything from installation to deployment. Whether you’re a beginner or experienced developer, you’ll learn how to quickly create a professional admin panel using modern Bootstrap admin templates.
Speed up your responsive apps and websites with fully-featured, ready-to-use open-source admin panel templates—free to use and built for efficiency.


What You’ll Build
By the end of this tutorial, you’ll have:
- ✅ A fully functional admin dashboard
- ✅ User authentication UI
- ✅ Data tables with sorting and filtering
- ✅ Interactive charts and graphs
- ✅ Responsive mobile-friendly design
- ✅ Dark mode toggle
- ✅ Production-ready build setup
Estimated time: 30-45 minutes
Prerequisites
Before starting, make sure you have:
- Basic HTML, CSS, and JavaScript knowledge
- Node.js 16+ installed (download here)
- A code editor (VS Code recommended)
- Terminal/command line access
- Git installed (optional but recommended)
Step 1: Choosing Your Template
First, you need a solid foundation. We’ll use CoreUI Free Bootstrap Admin Template because it’s:
- Production-ready out of the box
- Maintained by professionals
- Trusted by Fortune 500 companies
- Free and MIT licensed
- Well documented
Alternative Options:
- AdminLTE - If you prefer jQuery
- Tabler - If you want modern minimalist design
- Material Dashboard - If you like Material Design
For this tutorial, we’ll use CoreUI.
Step 2: Installation
Method 1: Download from Website (Easiest)
- Visit CoreUI Free Bootstrap Admin Template
- Click “Download” button
- Extract the ZIP file
- Open terminal in the extracted folder
Method 2: Clone from GitHub (Recommended)
# Clone the repository
git clone https://github.com/coreui/coreui-free-bootstrap-admin-template.git

# Navigate to the directory
cd coreui-free-bootstrap-admin-template
Method 3: Use npm (Advanced)
# Create new project directory
mkdir my-admin-dashboard
cd my-admin-dashboard

# Initialize npm
npm init -y

# Install CoreUI
npm install @coreui/coreui
Step 3: Install Dependencies
# Install all required packages
npm install

# This will install:
# - Bootstrap 5
# - CoreUI components
# - Build tools (Webpack, Babel)
# - Dev server
# - And more...
Note: This may take 2-5 minutes depending on your internet speed.
Step 4: Start Development Server
# Start the dev server
npm start

# Or use:
npm run serve
Your browser should automatically open to http://localhost:3000
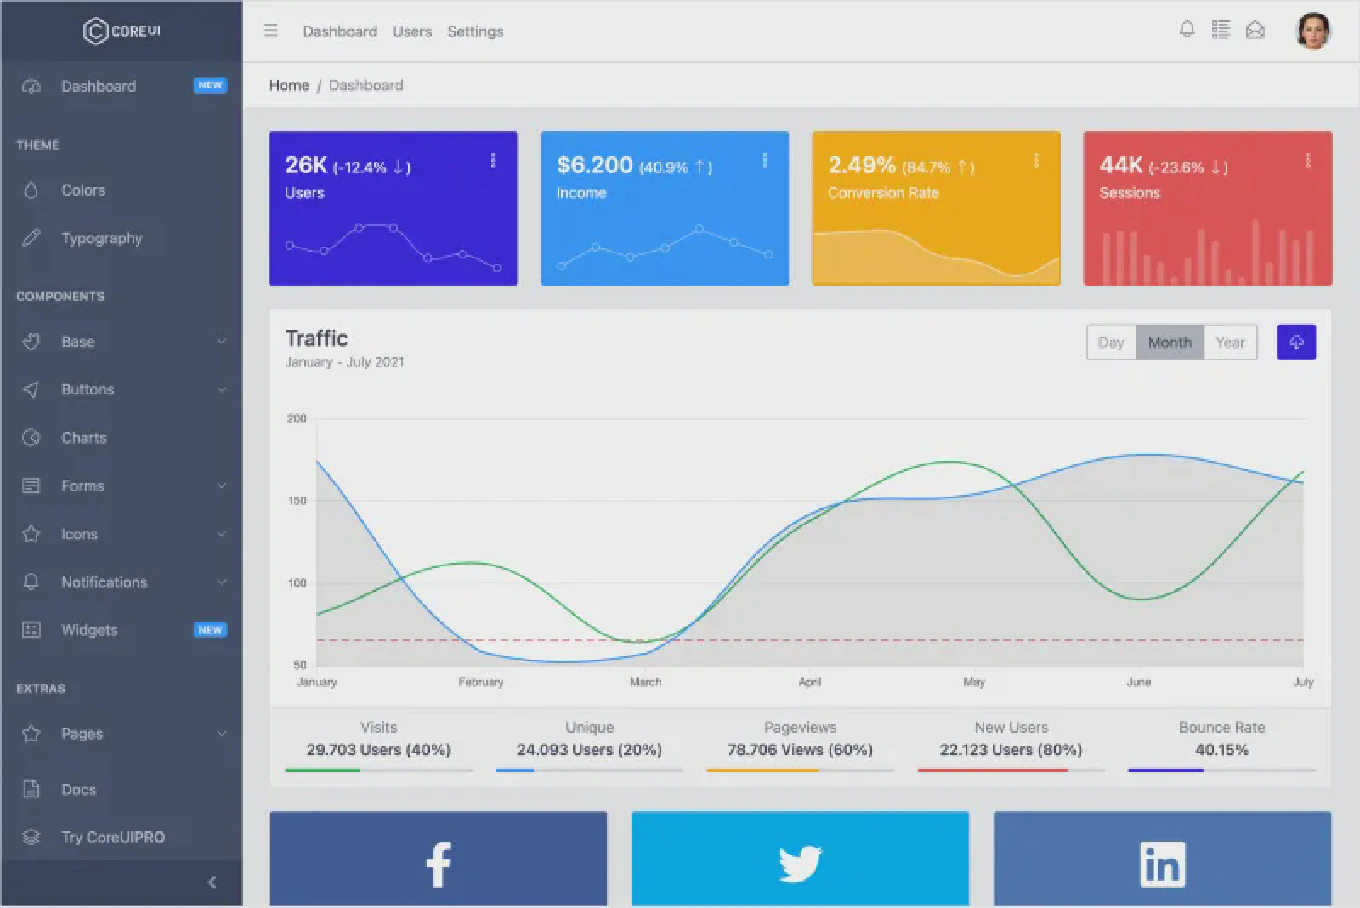
You should see:
- Clean admin dashboard interface
- Sidebar navigation
- Header with user menu
- Sample dashboard widgets
- Charts and data tables
🎉 Congratulations! Your admin dashboard is running!
Step 5: Understanding the Project Structure
coreui-free-bootstrap-admin-template/
├── src/
│   ├── assets/         # Images, fonts, icons
│   ├── js/            # JavaScript files
│   ├── scss/          # Sass stylesheets
│   ├── views/         # HTML pages
│   └── index.html     # Main HTML file
├── dist/              # Built files (production)
├── node_modules/      # Dependencies
├── package.json       # Project configuration
└── webpack.config.js  # Build configuration
Key files to know:
src/index.html- Main entry pointsrc/scss/style.scss- Main stylesheetsrc/js/main.js- JavaScript entrypackage.json- Dependencies and scripts
Step 6: Customizing Your Dashboard
6.1 Change the Brand Name
File: src/index.html
<!-- Find this line -->
<div class="sidebar-brand">CoreUI</div>

<!-- Change to your brand -->
<div class="sidebar-brand">MyCompany</div>
6.2 Customize Colors
File: src/scss/_custom.scss
// Add your custom colors
$primary: #007bff;    // Change to your brand color
$secondary: #6c757d;
$success: #28a745;
$danger: #dc3545;

// Import this before the main styles
@import "~@coreui/coreui/scss/coreui";
Popular color schemes:
- Tech startup:
#5856d6(purple) - Finance:
#2eb85c(green) - Healthcare:
#39f(blue) - Education:
#f9b115(orange)
6.3 Add a New Page
1. Create HTML file: src/views/my-page.html
<!DOCTYPE html>
<html lang="en">
<head>
  <meta charset="UTF-8">
  <meta name="viewport" content="width=device-width, initial-scale=1.0">
  <title>My Custom Page</title>
</head>
<body>
  <!-- Include header -->
  <div class="wrapper">
    <!-- Include sidebar -->

    <!-- Main content -->
    <div class="body flex-grow-1 px-3">
      <div class="container-lg">
        <h1>My Custom Page</h1>
        <p>Your content here...</p>
      </div>
    </div>
  </div>
</body>
</html>
2. Add to navigation: src/index.html
<ul class="sidebar-nav">
  <!-- Existing items... -->

  <!-- Add your new page -->
  <li class="nav-item">
    <a class="nav-link" href="views/my-page.html">
      <i class="nav-icon cil-star"></i> My Page
    </a>
  </li>
</ul>
6.4 Enable Dark Mode
CoreUI has built-in dark mode support:
<!-- Add this button to your header -->
<button class="btn btn-link" id="theme-toggle">
  <i class="cil-moon"></i>
</button>
// Add this JavaScript
const themeToggle = document.getElementById('theme-toggle');
themeToggle.addEventListener('click', () => {
  document.body.classList.toggle('dark-theme');
});
Step 7: Adding Components
7.1 Add a Data Table
<div class="card">
  <div class="card-header">
    Users
  </div>
  <div class="card-body">
    <table class="table table-hover">
      <thead>
        <tr>
          <th>Name</th>
          <th>Email</th>
          <th>Status</th>
          <th>Actions</th>
        </tr>
      </thead>
      <tbody>
        <tr>
          <td>John Doe</td>
          <td>[email protected]</td>
          <td><span class="badge bg-success">Active</span></td>
          <td>
            <button class="btn btn-sm btn-primary">Edit</button>
          </td>
        </tr>
        <!-- Add more rows -->
      </tbody>
    </table>
  </div>
</div>
7.2 Add a Chart
CoreUI includes Chart.js integration:
<div class="card">
  <div class="card-body">
    <canvas id="myChart"></canvas>
  </div>
</div>
import { Chart } from 'chart.js/auto';

const ctx = document.getElementById('myChart');
new Chart(ctx, {
  type: 'line',
  data: {
    labels: ['Jan', 'Feb', 'Mar', 'Apr', 'May', 'Jun'],
    datasets: [{
      label: 'Sales',
      data: [12, 19, 3, 5, 2, 3],
      borderColor: '#321fdb',
      tension: 0.4
    }]
  },
  options: {
    responsive: true,
    maintainAspectRatio: false
  }
});
7.3 Add a Modal Dialog
<!-- Trigger button -->
<button class="btn btn-primary" data-coreui-toggle="modal" data-coreui-target="#myModal">
  Open Modal
</button>

<!-- Modal -->
<div class="modal fade" id="myModal" tabindex="-1">
  <div class="modal-dialog">
    <div class="modal-content">
      <div class="modal-header">
        <h5 class="modal-title">Modal Title</h5>
        <button type="button" class="btn-close" data-coreui-dismiss="modal"></button>
      </div>
      <div class="modal-body">
        <p>Modal content goes here...</p>
      </div>
      <div class="modal-footer">
        <button type="button" class="btn btn-secondary" data-coreui-dismiss="modal">Close</button>
        <button type="button" class="btn btn-primary">Save changes</button>
      </div>
    </div>
  </div>
</div>
7.4 Add a Form
<form>
  <div class="mb-3">
    <label class="form-label">Email address</label>
    <input type="email" class="form-control" placeholder="[email protected]">
  </div>

  <div class="mb-3">
    <label class="form-label">Password</label>
    <input type="password" class="form-control">
  </div>

  <div class="mb-3">
    <select class="form-select">
      <option>Choose role...</option>
      <option>Admin</option>
      <option>User</option>
    </select>
  </div>

  <div class="mb-3 form-check">
    <input type="checkbox" class="form-check-input" id="remember">
    <label class="form-check-label" for="remember">Remember me</label>
  </div>

  <button type="submit" class="btn btn-primary">Submit</button>
</form>
Step 8: Connecting to Backend API
8.1 Fetch Data Example
// Fetch users from API
async function loadUsers() {
  try {
    const response = await fetch('https://api.example.com/users');
    const users = await response.json();

    // Update table
    const tbody = document.querySelector('tbody');
    tbody.innerHTML = users.map(user => `
      <tr>
        <td>${user.name}</td>
        <td>${user.email}</td>
        <td><span class="badge bg-${user.active ? 'success' : 'danger'}">
          ${user.active ? 'Active' : 'Inactive'}
        </span></td>
        <td>
          <button class="btn btn-sm btn-primary" onclick="editUser(${user.id})">
            Edit
          </button>
        </td>
      </tr>
    `).join('');
  } catch (error) {
    console.error('Error loading users:', error);
  }
}

// Call on page load
document.addEventListener('DOMContentLoaded', loadUsers);
8.2 Post Data Example
async function createUser(userData) {
  try {
    const response = await fetch('https://api.example.com/users', {
      method: 'POST',
      headers: {
        'Content-Type': 'application/json',
      },
      body: JSON.stringify(userData)
    });

    if (response.ok) {
      alert('User created successfully!');
      loadUsers(); // Refresh the list
    }
  } catch (error) {
    console.error('Error creating user:', error);
  }
}
Step 9: Building for Production
When you’re ready to deploy:
# Create production build
npm run build

# Or
npm run prod
This creates optimized files in the dist/ directory:
- Minified JavaScript
- Compressed CSS
- Optimized images
- Ready to deploy
Optimization features:
- ✅ Code minification
- ✅ Tree shaking (removes unused code)
- ✅ Asset compression
- ✅ Cache busting
- ✅ Source maps (for debugging)
Step 10: Deployment
Deploy to Netlify (Easiest)
- Push your code to GitHub
- Go to netlify.com
- Click “New site from Git”
- Select your repository
- Build command:
npm run build - Publish directory:
dist - Click “Deploy site”
Your dashboard is live in 2 minutes!
Deploy to Vercel
# Install Vercel CLI
npm i -g vercel

# Deploy
vercel
Deploy to Your Own Server
# Build the project
npm run build

# Upload dist/ folder to your server
scp -r dist/* [email protected]:/var/www/html/
Common Issues and Solutions
Issue 1: npm install fails
Solution:
# Clear npm cache
npm cache clean --force

# Delete node_modules and package-lock.json
rm -rf node_modules package-lock.json

# Reinstall
npm install
Issue 2: Port 3000 already in use
Solution:
# Use a different port
PORT=3001 npm start
Issue 3: Changes not reflected
Solution:
- Hard refresh: Ctrl+Shift+R (Windows) or Cmd+Shift+R (Mac)
- Clear browser cache
- Restart dev server
Issue 4: Build fails
Solution:
# Check for errors in console
npm run build -- --verbose

# Make sure all files are saved
# Check for syntax errors
Next Steps
Now that you have a working dashboard:
- Add authentication - Integrate with your backend
- Create more pages - Build out your application
- Connect real data - Hook up your APIs
- Customize design - Match your brand
- Add tests - Ensure quality
- Optimize performance - Use lazy loading
Learning Resources
Official Documentation
Video Tutorials
- YouTube: “Bootstrap Admin Dashboard Tutorial”
- Udemy: “Complete Bootstrap Course”
Community
Frequently Asked Questions
Do I need to know React/Vue/Angular?
No! This tutorial uses plain HTML, CSS, and JavaScript. However, CoreUI also offers free templates for React, Vue, and Angular if you prefer those frameworks.
Can I use this for commercial projects?
Yes! CoreUI is MIT licensed, which means it’s completely free for personal and commercial use without any restrictions.
How do I add user authentication?
You’ll need to integrate with a backend authentication system. Check out:
- Firebase Authentication
- Auth0
- Your own Node.js/PHP/Python backend
Can I remove components I don’t need?
Yes! CoreUI is modular. You can remove unused components to reduce bundle size:
// In your scss file, only import what you need
@import "~@coreui/coreui/scss/functions";
@import "~@coreui/coreui/scss/variables";
// Don't import unused components
Is it mobile responsive?
Yes! CoreUI is built mobile-first and works perfectly on all devices. Test it by resizing your browser or using Chrome DevTools device emulation.
How do I update to the latest version?
# Check current version
npm list @coreui/coreui

# Update to latest
npm update @coreui/coreui

# Or specific version
npm install @coreui/coreui@latest
Conclusion
Congratulations! You’ve learned how to:
- ✅ Install a Bootstrap admin template
- ✅ Customize the design
- ✅ Add components
- ✅ Connect to APIs
- ✅ Build for production
- ✅ Deploy your dashboard
Ready for more?
- Explore all CoreUI components
- Check out advanced examples
- Compare different admin templates
- Learn how to choose the best template
Questions? Drop them in the comments below or contact CoreUI support.
Last updated: January 28, 2026